Someone upthread asked how to learn to do a kick turn. I can't find the reference now to quote that post, sorry. But anyway here's how I teach it. Given that most lessons I teach are one hour, or 1.5 hours, I don't usually take the time to teach kick turns, but I do when I have an all day lesson with British teens.
1. Face downhill with skis across the hill. Stick both poles behind you firmly into the snow to keep you from falling over as you lift the downhill ski. Lean back on the poles. You can position the grips and your hands holding onto them at the back of your butt so your hands won't wobble. Do this with the poles because lifting the ski is the hard part; people lose their balance and topple if they don't use the poles this way at first. Those two poles will help stabilize you. Be sure to lean back firmly on the poles.
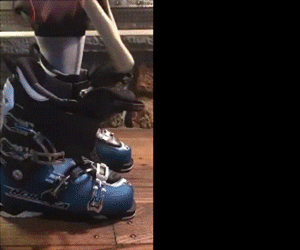
2. Lift downhill ski up off the snow until it is vertical, and prop its tail in the snow right next to the tip of the uphill ski. That tail must be right next to the uphill ski's tip. Reposition if at first unsuccessful, leaning back on the two poles stuck in the snow behind you to stabilize yourself. (Don't move the poles, lean back on them!) The tail of that ski once it's on the snow added to the two poles behind you will form three points of contact that will increase your stability from this point on.
**3. Next, rotate the upright ski's tip down onto the snow below you, using its tail as the pivot point. You will have rotated the tip and dropped it onto the snow beside the uphill ski that you've been standing on. The goal is to drop it parallel to the uphill ski. The tail, stuck in the snow, shall not move! If your range of motion in your hips doesn't allow it to get it fully parallel, just do the best that you can. Scoping out a "clear runout" is needed if you are doing this on a pitch andif you cannot get the skis parallel; you might take off downhill a little. I teach this on flat terrain at first to avoid that issue.
**It's at the start of #3 that seriously cautious skiers can back off and put the lifted ski back where it was before. #3-4 involve the "commitment" the skier in the video above talks about, which can appear quite daunting until done once.
4. As that ski tip rotates and drops, move your belly button downhill across the ski you've been standing on and rotate your body to face in the direction the dropped ski is pointing. This is one fluid motion. Its purpose is for you to transfer your weight to the rotated ski. This feels scary the first time you do it, but once done done you'll realize it's easier than it looks.
5. When you are firmly standing on the rotated ski, bring the uphill ski around and set it down on the snow beside you, with both skis pointing in the same direction. Done!
6. Improving the move:
(a) Take it from the flat pitch where you learned it to a green pitch, then a blue, then to a black pitch. #2 above is easier when it's steeper, but #4 is scarier as pitch increases. You'll be lifting and rotating the downhill ski. Practice every day until comfortable.
(b) Eliminate propping the lifted ski's tail on the snow; do the whole maneuver keeping that ski lifted, as demonstrated in the video above.


 Will be waiting for a bit more terrain to open though, I wouldn't feel safe doing this with the current skier to trail ratios in New England..